Monday 31 December 2012

Cake-A-Month - January - Post 1


I'm really feeling over sickeningly sweet chocolate cakes after the Christmas cake, and ever since we came back from our holiday to Hawaii I've been obsessed with all things coconut. Then I saw this cake from The Cake Blog and I fell in love:

Isn't it just so fresh and summery looking?
At first I was going to do a basic single tier version of the same cake - with different flavors inside of course! - but then I decided against it because I've made things with fondant similar to the lemon slices before and there are so many other techniques I want to try out. Then I came across this flower tutorial from Bronnie Bakes and this picture tutorial on Pinterest (sorry, I don't know who to credit with this picture, but have included the link that's attached from Pinterest - if anyone knows who to credit the tutorial to, please let me know!).

Fondant flower tutorial from unknown source - sorry!

Fondant flower tutorial from Bronnie Bakes


So what I've decided to do is use Beyond Buttercream's white cake recipe to make a single tier coconut cake, torted into 4 layers and filled with a lemon curd, and frosted with a lemon version of Sweetapolita's Swiss Meringue Buttercream, covered in fondant with a yellow satin ribbon border and 2-3 yellow fondant flowers. Phew! :)

Techniques I want to learn with this cake:
  • A proper white cake recipe which can hopefully be the basis for many more cakes in the future.
  • Making Swiss Meringue Buttercream
  • Covering the cake with fondant
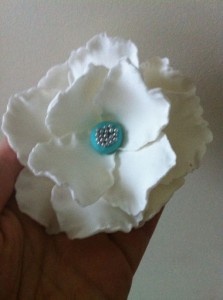
  • Fondant flowers
  • Using a ribbon border
  • Getting a perfectly smooth buttercream frosted cake
 It's my 25th birthday next month, as well as my husbands 25th birthday - we're 2 days apart - so hopefully I'll have a pretty cake to serve at our birthday dinner :)

Pretty As A Picture - Using The Histogram

I found a link to this article on Pinterest on tips that photographers wish they knew about sooner and one of the items mentioned was using the histogram on the camera. Well I had no idea what a histogram is so I looked it up and found this awesome site explaining what the histogram is and how to read it and apply it to your photography.
Of course I had to go and start practicing with it straightaway! After all, practice makes perfect...or so they say :) Here are some photos I took using the histogram to view the exposure and manually setting the exposure compensation.


I thought the photos came out beautifully - although, I will confess that I played around a little bit with Photoshop on the middle photo to wash out the background a bit more. Aren't my boys beautiful? <3

Cake-A-Month - December - Post 5


This will be the last installment about the Christmas cake I made. I wanted to go over some of the problems I had and mistakes I made and things I'll try to change around next time.

Problems I had:
  • Fondant. 'Nuff said.
  • Sides bulging
  • Cake was overpoweringly sweet
  • Cake was a bit dry

At the end of the last post I had a photo of my finished cake. Well that photo is a bit misleading. That's what it looked like when I was finished decorating it and for that day but by the next day the sides had started to bulge. I thought that I was safe from that happening because I had used a dam around the filling when torting the cake but I don't think that I had used a stiff enough frosting for the dam. I thought I simply had to use the same frosting and that the act of putting the dam there would be enough, but I should have made the frosting for the dam much stiffer. Next time around I'll trythe stiffer frosting, as well as less frosting since it was so sweet!

Bulging sides


The cake was also very very sweet. Not so much the cake itself, but with the frosting between each layer, ganache over the top and then fondant, it was very rich and sickening. Next time I'm going to try making a swiss meringue buttercream frosting, I've heard terrific things about it and it isn't meant to be anywhere near as sweet as American buttercream. It's meant to be a bit difficult to make but with Sweetapolita's instructions I'm going to try and attempt it anyway. Note: If you haven't looked at her blog before, I seriously recommend it!! I'm always lurking on her blog drooling over her gorgeous creations! That ruffle cake is to die for!
I'm also going to try putting less frosting between each of the layers next time. We'll see how it goes next month...
The texture of the cake was a little too dry as well. Normally this cake is really really moist, it's one of the things I love about the recipe. There are a couple of factors that I think may have made the cake so dry. For starters I wasn't really sure if this was the right type of cake to put under fondant, I'm still thinking that maybe it was too soft and may have added to the bulging problem. I don't think that going in and out of the fridge and freezer really helped and I think that the hot weather may have also contributed. I really have no idea but there are some things I'm going to do next time to make sure this doesn't happen again:
I'm going to try out a recipe for a white cake that many bakers on Cake Central recommend from Beyond Buttercream. I don't really have a go-to recipe for a white cake so I'd like to try this one and see how it works for me.
Next time I'm not going to constantly take the cake in and out of the fridge or freezer, I'll try to organize it a bit better so it gets defrosted only 1-2 days before it's going to be served. I'll also brush each layer with some sugar water when stacking, supposedly that's supposed to help lock in moisture.
I had left it out at room temperature the last night because supposedly you're not supposed to put fondant cakes in the fridge since it makes the fondant sweat but I've read from lots of people that do it anyway without any problems so I may try to do it anyway next time so the heat doesn't dry out the cake.
I haven't given up with fondant, I'm determined to get it right. I think my biggest issue was with the humidity and heat, but if I want to continue doing cake decorating in the future then I'm going to have to learn to deal with the Aussie summer weather! My house is relatively cool though and I hadn't bothered turning the fans on that day, next time I'll have the fans going in the kitchen.

Overall I'm pretty happy with month 1, I think that I did a really good job considering it was my first time tackling fondant and the weather conditions weren't in my favor at all. I'm looking forward to next months cake. Its my husband's and my 25th birthdays next month (our birthdays are 2 days apart) so I might do a joint birthday cake for us. I'm thinking a coconut cake with lemon curd filling and lemon SMBC frosting, yummo!

Sunday 30 December 2012

Pretty As A Picture - Aperture

A couple of days ago I came across a link on Pinterest to a free week-by-week DSLR course by It's Overflowing. Each week the course focuses on a different DSLR feature or tip and has an exercise for you to practice over the week to acquaintance yourself with what the feature on your camera does and how to apply it when taking photos.
Okay, okay, so the course is already a year old so everyone else out there probably already knows all about it and I'm just running along in the dust struggling to catch up. Story of my life, go figure! But meanwhile, I have a brand-new DSLR that I'm too scared to take off Auto, so I've decided that I'm going to go ahead and follow along anyway. I'm just going to start with the first post in the series and remain plodding along behind everyone else.
I may try to do 2 posts per week until I catch up, but that may be a bit ambitious for me seeing as how I also have a 3 year old and a 7 month old to look after, am studying from home full-time, have just started the Cake-A-Month Challenge and I'm possibly the laziest, biggest procrastinator of all time....I mean seriously, have you seen my house??? Housework falls under the category of 'Only Do When Virtually Impossible To Put Off Any Longer' (ie when someone is on their way over...or I've lost 1 or both of my children in the chaos).

So her first post in the series is about aperture. Her explanation of aperture made it super easy to understand (meaning, I now understand better than the non-existent understanding I had before...). My DSLR is an entry-level Canon T3, and I have two lenses, the basic 18-55mm lens and a 75-300mm zoom lens. With the basic lens I have an aperture range from f3.5 to f36 and with the zoom lens the aperture range is f4 to f45.

I don't really know what that indicates though...I mean, I know that the more aperture, the less light being let in, the less aperture, the more light let in...so I guess that means the zoom lens doesn't actually allow in as much light as the basic lens?? Hmm, I wouldn't have expected that - don't know why though! I guess I sorta thought the bigger and better the lens the more options in terms of lighting you would have - silly, I know! I'm obviously a complete noob when it comes to photography haha!

So the exercise she suggested in the post was to pick a subject somewhere with lots of lighting, like near a window and take a photo of the same subject in each aperture. At first, when reading the post, I was holding onto Baby Z so I just grabbed the camera with one hand and took a bunch of photos of the water bottle sitting on the table.
When I went to compare the photos I couldn't tell the difference at first - even between the highest and lowest setting! I was perplexed as to what the hell the aperture was changing in the picture, so I asked DH if he could see any difference. He looked at me in confusion and straightaway pointed out the difference lol! I'd been looking at the water bottle in each picture trying to see the difference and failed to notice that in every picture the background was getting more and more blurry! Silly me, I'd been thinking that if aperture is the amount of light being allowed in, that the more aperture the darker the image would be getting, I didn't realise it had anything to do with the field of focus!
Actually, in hindsight I'm now realising why the smaller lens was able to go lower in terms of aperture. The smaller lens is a macro lens, used for taking close-up shots. Well normally in these photos the background behind the area being focused on is blurred out. Well that makes sense to me now, the photographer probably uses the lens on the lower aperture settings to get that type of shot. Well my macro lens isn't a very good one, it's just the basic one that came with the camera which is why the lowest aperture setting is only 3.5, whereas on It's Overflowing she was talking about putting aperture on 1.8.

Drive Me Batty - Aperture

Yeah, I know I don't have the best lighting in these pictures, guess my photography skills are still pretty sucky! Don't mind my messy kitchen either...the kids haven't disappeared into the mess yet, so I'm not worried :)

Anyway I'm still playing around a bit with this setting, I wish I had a better macro lens but this one will have to do I guess. The next post is about shutter speed which I've been playing around with a bit already, so I'll post up my results in the next couple of days once I've had a chance to figure it out a bit more.


Cake-A-Month - December - Post 4


Okay, onto the part that I was dreading excited about trying very very nervous about: the fondant! I had made my own marshmallow fondant for my sons 1st birthday cake but I really didn't know what I was doing at the time. The recipe said to mix icing sugar (powdered sugar to those in the states) through the melted marshmallows until it came together at the right dough-like texture for fondant. But I'd never worked with fondant before so I had no idea what the right texture was, so I just made a guess and it worked out perfectly fine for the time since I was only using it to sculpt bugs but I don't think that method would work very well if I were trying to cover a cake in fondant so I decided this time around to buy some of the pre-made stuff to get a feel for how it's supposed to feel to work with (not Wilton brand though! I may be new at this but I know better than to buy Wilton's pre-made fondant lol!).
My very first attempt at cake decorating. A bug themed cake for my sons 1st birthday.
 After reading up a bit on it I decided to use the Satin Ice brand. It's taste is meant to be quite nice and although it's supposedly more difficult to work with especially compared to Wilton I figured I may as well use the real stuff rather than wasting my time and money on Wilton fondant. It cost a small fortune though, it wasn't readily available in any of the nearby stores here in Canberra so I had to buy it online. Cost me $25 including postage :O
It was terrible weather when I was working with the fondant, it was hot and muggy and very very humid. Needless to say I had several problems. First I think I was working with the fondant too much, I kept rolling it out using powdered sugar to keep it from sticking and to help it not be so soft and sticky (I now know that powdered sugar then makes it very dry and promotes cracking), but then it would get too dry and I'd use shortening, only to have it get too soft in the warm weather. I'd roll it out but it would tear and I'd roll it back into a ball to roll out again. Long story short, I should have just left it alone instead of constantly adding this, then adding that to fix the problem this caused...
I also didn't think I would have enough fondant. The 2 pound tub I bought was supposed to be enough to cover a 4" high 10" wide cake, my cake was 9" and about 3.5" high so I figured it would be enough but when rolling it out I ended up having to roll it really thin to have enough to cover the cake. The thinner the fondant the more prone to tearing and more difficult to work with so I wasn't off to a great start.
Finally after a lot of swearing and help from my helpful hubby I got a nice large circle of fondant about 20" across, enough to cover the cake with an inch spare either side. I used my rolling pin lift it and cover it over the cake and quickly smoothed down the top and tops of the sides. This is where the second lot of trouble started.

The fondant tore. In several places actually. It was just too heavy and thin and couldn't cope with the weight and ripped. Then all these miniscule cracks started appearing at the top edge in the fondant. I quickly worked on smoothing and attaching the fondant to the rest of the cake, quickly cut away the excess and tried to work out how to repair the tears. I'd read about a lot of people having luck with using shortening to fix the cracks so I started rubbing shortening into the miniscule cracks to soften the fondant up enough to close the cracks. Luckily it worked pretty well. Then my husband gave me a hand and discovered a way to fix the large tears. He would get a bit of fondant, soften it up with shortening and sorta 'patch' it over the whole then use the shortening to smear the edges to make it look seamless. It actually worked pretty well and we managed to repair all the cracks. By this point the fondant was getting too soft from the humidity so we decided to put it away in the fridge for a few hours to harden it up.

A few hours later we brought the cake out and used shortening to finish smoothing the miniscule cracks and edges of the patch-jobs and used the Wilton fondant smoothing paddle to finish the smoothing job. Despite all the problems I had, the end result was actually pretty good and I was very proud of my our work.

Despite the problems I had I reckon it looks pretty damn sexy!!
 I decided to leave the cake sitting out overnight under a fan to help dry it out because even after being in the fridge the fondant was still pretty soft and...squidgy :/

The next morning I attached the snowflakes with dabs of royal icing and took it to the in-laws for Christmas Eve dinner :)


Pretty happy with the results!
Look at all those pretty layers!


Saturday 29 December 2012

Cake-A-Month - December - Post 3


In the last post I made my cakes and layered them with cherry brandy buttercream frosting. I forgot to mention that I wrapped the cake up and placed it back in the freezer after this. The next step was to frost the cake with ganache and I'd read that this was easier to do with a frozen cake.

I made my ganache in the microwave using 2 parts of milk chocolate melts to 1 part of cream. When I was trying to work out what type of cream to use the articles I had read said to use whichever type of cream you use to make whipped cream, which here in Australia is usually thickened cream so that's what I grabbed in the store. The morning before I went to make the ganache though I read a bit more and discovered that thickened cream wasn't recommended because they add gelatin to it and the carton of pure cream was preferred. I crossed my fingers and used the thickened cream anyway and fortunately it worked perfectly.
I ended up using the ganache recipe instructions which were on the back of the packet of chocolate melts, which was the microwave method. Worked brilliantly and the ganache was to die for!! I put it in the fridge overnight to harden it up so it was a frosting consistency to spread on the cake - otherwise the ganache is too runny and ends up being a pouring version.

Mmmm, all gone now!
So I frosted the frozen cake using an angled 10" spatula, and held the metal blade under hot water for a few moments to heat it up, then used that to smooth the frosting. I was able to get pretty sharp edges and smooth sides using the ganache, very very impressed with the results of using ganache instead of buttercream for this stage!

This ganache was so damn good, I was tempted to roll around in a bowl of it!!


Once I had covered the cake in ganache I put it back in the freezer and got started on making the decorations for the cake. Even though I live in Australia and Christmas is essentially in the middle of our scorching hot summer I wanted to decorate the cake with snowflakes to keep with the Christmas theme.
I'd been looking at Sweetopia's blog and her beautiful sugar cookies and was inspired. Even though I was making a cake and not cookies, I decided to take that inspiration and pipe some delicate snowflakes onto wax paper with her royal icing recipe and transfer them to the cake rather than piping directly onto the cake. I'm not a very good artist and don't trust myself to do designs free-hand so printed off some basic snowflake designs to place under the wax paper

Pretty little snowflakes
 You can just see the printout I used at the top of the picture. I got most of the printouts from Knuckle Salad, although I also used another image from one of Betty Crocker's recipe's.

It took the better part of an entire day to pipe out the snowflakes, but they turned out so delicate and beautiful, it was definitely worth the aching hand!! I left them on the wax paper overnight to set and harden then in the morning used my angled cake knife to gently lift them from the paper as I pulled the wax paper down over the edge of the table like in the photo above. That way the edges started to peel off the paper by themselves before I eased the knife under.

I had piped out about twice as many snowflakes as I thought I would need because I was expecting most of them to break as I tried to lift them off the wax paper. I was very surprised to find that I only broke about 3 out of the entire batch! And one of them was because I dropped it in shock that it had come off so easily lol!

I stored them in an airtight Tupperware container till I was ready for the decorating stage.

Friday 28 December 2012

Cake-A-Month - December - Post 2


For my Christmas cake I used my trusty chocolate cake from scratch recipe. I found this recipe about 5 years ago when looking for an eggless cake recipe for my mom who is a lacto-vegetarian (eats dairy products but not egg or any other form of meat including seafood). I tested this recipe before making it for her and was stunned to find that it actually tasted pretty darn good - REALLY good!! AND it doesn't have dairy in it either!!! And to top it off, its made completely of pantry non-perishable staples that I always have in my kitchen, yay! Oh and did I mention how easy it is??? It's essentially a box cake recipe, it's so darn easy to make. I never bother with sifting and rarely measure my ingredients too carefully lol but I've never had this recipe fail on me, and I am ALWAYS asked for the recipe - even by my mother-in-law who is well-known for her baking talents :D I'm sure by now you're probably tearing your hair out wondering when the hell I'm going to get around to telling you the recipe...well I'll get to it. Eventually. At the end of this post.... (and the suspense builds...)

So, back to the Christmas cake, I baked four thin layers, and leveled them off. Normally I don't bother levelling my cakes, but when I try to do a fancy-ish cake in the past I've always cut them with a bread knife and eye-balled it. Doesn't usually go too well but I rarely bother so didn't really think much of it. But for my sons 1st birthday I bought the Wilton's cake leveller since I decided that for the price if it worked it would be worth it. Well fyi, it doesn't. It sucked, the wire wasn't stretched taut enough across the frame so when I went to use it it just stretched and went wherever the hell it wanted. I had these visions of it simply gliding through the cake, but it wasn't even sharp, I ended up having to saw it as though I was using a knife anyway. I think I got about halfway through the cake before giving up. Goddamn it.

But then, I read about this technique of measuring the height you want with a ruler and inserting toothpicks around the cake every couple of inches, then using a bread knife to score a couple of millimeters deep around the cake before cutting all the way through with the bread knife while keeping even with the toothpicks. I think I even watched a video of it on youtube that made it look so easy so I decided to try it for the Christmas cake. Well, whaddya know! It actually works!!! Didn't take too long to do at all, didn't require buying any special gimmicks that don't work, and was easy and straightforward. I highly recommend using this technique if you're like me and have crooked eyeballs lol!

This isn't the same brand as the one I used, but it does look exactly the same.

So then after freezing my cake layers, double wrapped in glad wrap (saran wrap for the rest of you guys not located in Oz!) I made up a batch of cherry brandy frosting. I tend to freeze my cakes because I find that the cake ends up really nice and moist after being frozen, never noticed any negative difference in flavor (only the moisture and that can hardly be described as negative!) and hell, makes it easy!

Tada! Mmmm looks good so far!
I made the cherry brandy frosting by mixing up a batch of standard buttercream frosting (I think it's often referred to online as American buttercream - even though we make it here in Australia too lol - and is made mostly from creaming powdered sugar with butter) then adding about 1/4C of cherry brandy and about half a cup of chopped up red glace cherries. I would have used maraschino cherries but they're very very difficult to find here in Australia and I had no luck searching :(
I'm not going to add the recipe for the buttercream frosting because I didn't end up liking the recipe I used very much, it was sickeningly sweet and nearly made the cake unbearable.

When torting the cake I piped a dam of frosting around the edge of the layer before covering in frosting. Supposedly this helps prevent issues of the frosting being squashed out from between the layers and causing the fondant to bulge. In another post I'll explain where I went wrong with this :(

My No-Fail Egg-Free, Dairy-Free but Yummo Chocolate Cake

 1.5 cups plain flour
1 cup sugar
4 tablespoons cocoa
1 teaspoon bicarb soda
1/2 teaspoon salt
1 cup water
1/3 cup vegetable oil (I've also used olive oil and canola oil if I'm out of vegetable oil with no discernible difference)
2 tablespoons white vinegar
2 teaspoons vanilla extract

Preheat oven to 180 Celsius, or 350 Fahrenheit
Mix all the dry ingredients.
Mix all the wet ingredients.
Add wet to dry and mix till thoroughly incorporated. Batter will be fairly runny for a cake batter - this is okay!
Pour into greased cake tin (I've used all sorts of different shapes and sizes, best would have to be an 8" round) and bake for 30-40 minutes.
Let cool for ten minutes before removing from the tin to cool completely.

**Note: A lot of people are very surprised about using vinegar in this recipe. Don't worry, I was the same when I first read the recipe, but somehow or other it actually works! The best I've been able to figure from searching online is that the vinegar somehow compensates for the lack of eggs in the recipe. Not sure how or why, I'm no scientist, I just enjoy eating the damn things!!

Thursday 27 December 2012

Cake-A-Month - December - Post 1


So for the first month I decided to make a Christmas themed cake - of course! - and I really wanted to learn how to work with fondant, specifically how to cover a cake in fondant. I made my own marshmallow fondant for my sons 1st birthday cake and used it to sculpt a bunch of bugs and leaves to decorate a buttercream frosted cake. I didn't feel confident enough at that point to try covering the cake in fondant (afterall, it was the first cake from scratch I had ever made!), and it turned out really well and received a lot of compliments.
So for my Christmas cake I decided to make a 4 layer chocolate cake with cherry frosting and decorated with snowflakes.

The techniques I wanted to practice with this cake were:
Making a layered cake.
Making my own buttercream frosting (in the past I just used the canned Betty Crocker icing lol!)
Covering a cake in fondant
Some basic piping

After a bit of research I also decided to cover the cake in chocolate ganache instead of more buttercream since it would supposedly give the cake sharper edges and smoother sides once covered in fondant. I used my own trusty chocolate cake recipe that I've been making for years now (tastes sooo good, everyone loves it and asks for the recipe, it's extremely easy to make and uses only staples I always have on hand AND - you'd never guess it BUT - it's egg-free and dairy-free!!! I'll post the recipe later lol), used Sweetopia's royal icing recipe and made a basic ganache.


I'll go through the process of making this cake over the next few posts.

Wednesday 26 December 2012

Sweet Returns

Okay, so I have a confession to make: this isn't my first blog. Or even my only blog :O I always start off full of enthusiasm and high hopes and then after about 5 posts or so I sorta run out of steam and the posts slowly start to dwindle off and eventually stop altogether.
I should be compared to a tropical storm leaving a trail of destruction and abandoned blogs behind. So consider this fair warning when a month down the track my posts stop altogether again. You only have yourself to blame.

So, this blog was originally started as a diary of our journey converting my in-laws garage into a small apartment. Well, we're still going through with the project but we've put it on hold for now, and probably won't be starting till halfway through next year. We've decided on postponing this for several reasons but namely we're happy and comfortable in our current situation and not in a rush to get started. Mainly focusing on family (now that we have a new addition to our family!) and setting ourselves up in a new state and town.

So in the meantime, there's another area of my life that I've been focusing on over the past couple of months which I would love to share with the blogging world. Since I made the birthday cake for my sons 1st birthday, I've been very interested in baking and cake decorating. I've sorta sat back and waited for opportunities to come up to make a new cake and learn new techniques but realised about two months ago that in the past 3 years I've only had about 2 opportunities come up to try out new things! So stuff it, I'm done with sitting around and waiting for life to throw me some parties or celebrations to bake for, I've decided to go ahead and make my own opportunities!


Hence the Cake-A-Month Challenge. Over the next year I am going to produce a new cake (or cupcakes, or cake pops - basically anything involving batter and an oven lol!) every month. Every month I'm going to focus on something new, something I've really wanted to learn or experiment with, and I'm going to try to produce beautiful, yummy cakes!

I'm actually a little bit late with this post, I actually began this challenge a month ago but only decided to start blogging about it now because now that I've finished the first month I'm even more determined to keep going. So keep tuned for the first post about the first cake in my Cake-A-Month Challenge: the snowflake themed Christmas cake.