

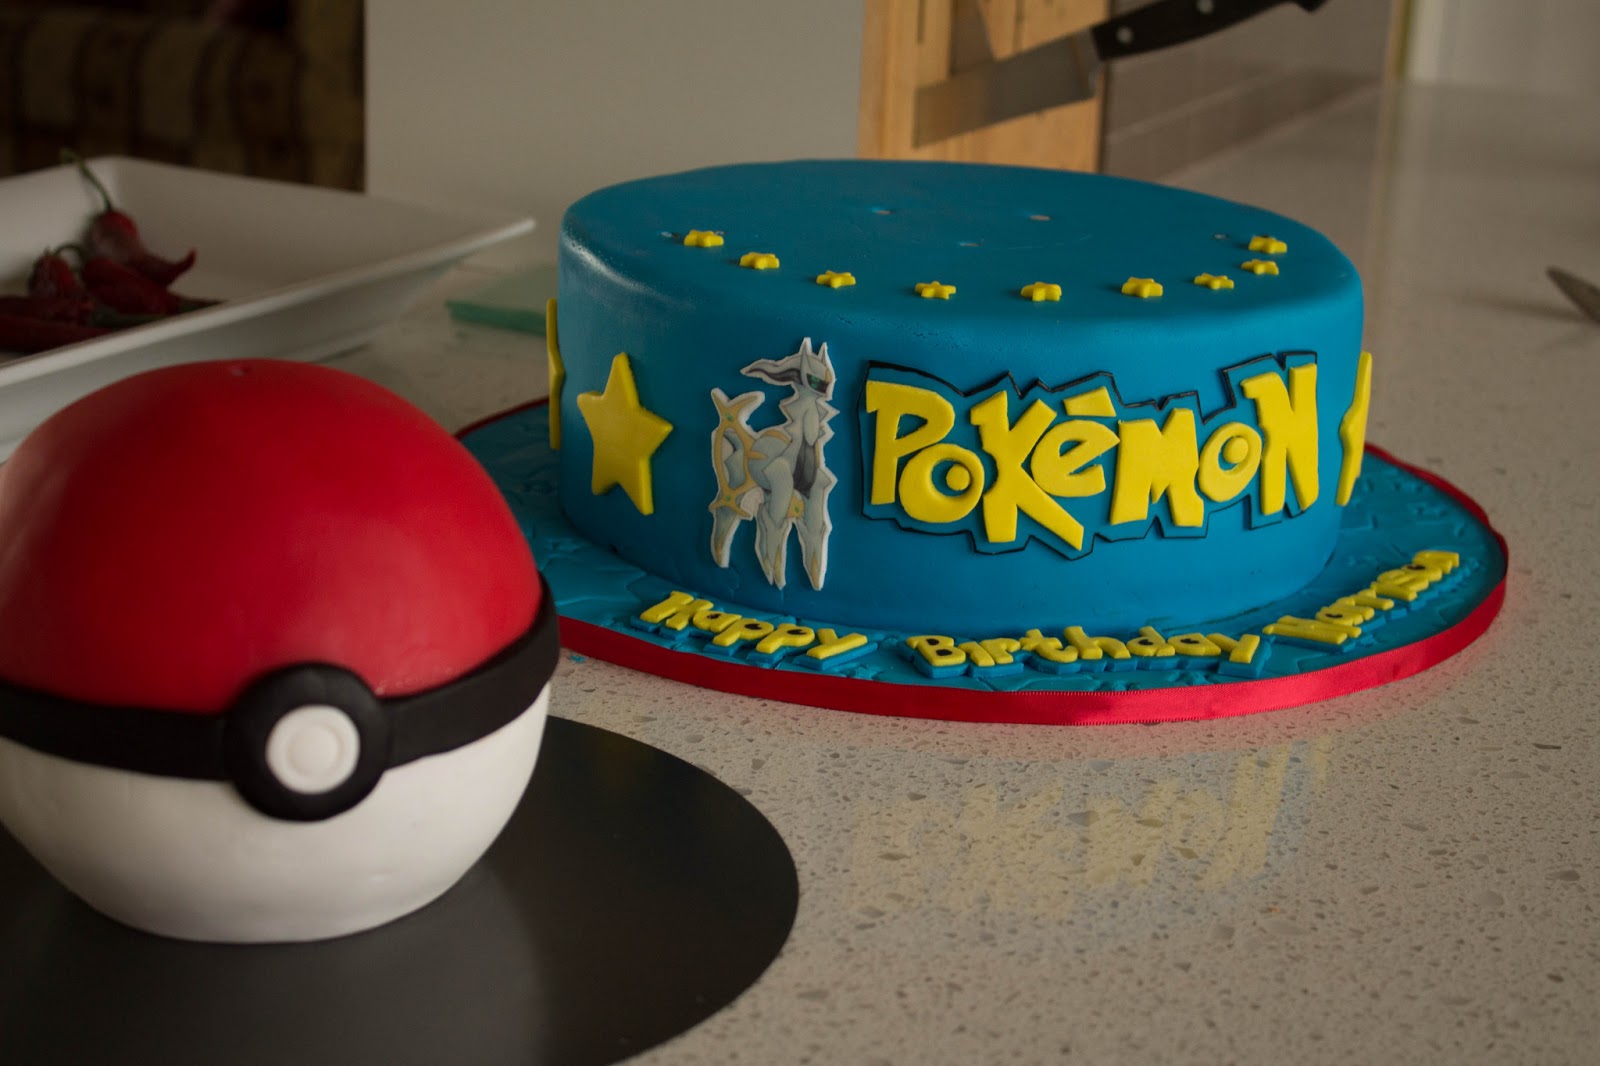
I took all the reviews on board and this is how I made the ball: First I used my chocolate cake recipe as a tester. I sprayed the pan well with cooking spray then used my silicone pastry brush to make sure the entire pan was evenly covered, then I also floured the pan. The pan has a rounded bottom which a lot of people had a lot of trouble with - I just sat the pan inside one of my oven-safe ramekins and had no problems!
The chocolate cake recipe says to bake at 175 for about 35 minutes, instead I reduced the temperature to 160C and baked for about 50 minutes. I also placed a pan of water in the bottom of the oven.
I found I needed to fill the pan nearly to the top - there was probably only about 1cm gap between the batter and the top of the pan but the cake didn't overflow, it rose just above the edge of the pan and was perfect for leveling once it had cooled.
I found it easiest to put the two halves together, ganache the entire ball and then cover each half in fondant seperately (I cut a small bit off the bottom of the ball so it had a flat base to sit on). I covered the white side first by placing the ganached ball upside down in a bowl and cutting off the fondant at the half way mark (that was easy enough to measure out since I knew the ball was 5" tall). I then cut a circle out where the cardboard base was on the ball (yes, initially I covered the cardboard base up - I found this worked easiest!). I then turned back the right way around and did the same with the red fondant. The seam where the two fondants met was covered by the black ribbon.


I did the Pokemon logo by printing it out on my computer, cutting each letter out and sticking to my fondant with shortening, then tracing out with my Xacto knife. I used the same technique for the Happy Birthday message on the bottom and the lightning bolts.
For the lightning bolts I used 22guage floral wire so that they looked like they were shooting out from the cake. I let the lightning bolts dry for a couple of days before I heated up the wires and inserted them into the lightning bolts.
I used a dowel+cardboard base support system so the weight of the Pokeball wouldnt squash the cake and covered a masonite cake board in fondant for the first time.
I was extremely happy with how this cake turned out and looking forward to a couple more orders I've received as a result!!
No comments:
Post a Comment